Reverse Engineering the Amazon Dash Wand: Part 1 - First Steps
Posted: August 14, 2017 by James Pavur
About the Project
I recently picked up Amazon’s new Dash Wand essentially for free due to an Amazon promotion ($20 worth of Amazon credits if you purchase the $20 device).
The device itself packs a pretty hefty amount of hardware for the cost. It includes a microphone, a linear image sensor for barcode reading, assorted LEDs, a nice big button, speakers, Bluetooth Low Energy and Wifi. It’s all powered by (replaceable) AAA batteries, can be affixed to any magnetic surface or hung from an adhesive hook it ships with, and is remarkably compact and portable.
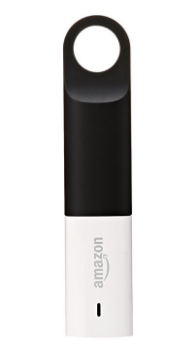
Compact, cheap, lots of hardware.
In short, this is a pretty astounding amount of hardware to be able to snag for free and nothing to sneeze at for the full $20 price. Of course, Amazon is likely subsidizing the hardware costs a little in the hopes of seducing consumers into using the device to do shopping without leaving home.
As a hacker though, it would be nice to “liberate” IOT devices like this and have full control over the data they send and what is done with it.
This series of blog posts covers the steps I’m taking to understand and (hopefully) take control of my Amazon Wand. I’m writing it contemporaneously with my research to share the process I take when assessing devices and help any other researchers looking at the Wand themselves or similar IOT platforms in the future replicate this approach.
Step 1: Research

Worth a shot...
IOT hacking is very much a “shoulders of giants” sort of hobby and getting a sense of what other people have done with a target platform, as well as making use of any public information, is an important step.
The best source I’ve found on the Dash Wand’s hardware has to be Matthew Petroff’s excellent teardown. Although it seems to refer to a slightly earlier version of the device from a software perspective. The FCC-ID and model number align with the one I picked up though, which means the hardware should be more or less identical. His teardown gave a really good sense of what was inside the device and also included two very important clues for me:
- “the software appears to share a code base with the second generation Dash Button”
- “its primary configuration interface is Bluetooth Low Energy”
The first clue helped me expand my research to a few other helpful sources. Knowing that the wand shared functionality with a Dash button directed me to look at a handful of existing projects reversing previous Amazon Dash Buttons. Unfortunately, as my research progressed it turned out that the Dash Wand had disabled much of the functionalities previous hacking efforts had focused on (such as the /flash endpoint in the original device, documented here).
Step 2: Networking
Once I had the device in hand, one of the first things I wanted to check was how it communicates to Amazon’s services. A lot of IoT devices will implement APIs in a way that can be intercepted and manipulated (for example, providing a fake firmware update to the device).
My IOT capture setup involves a Raspberry Pi 3 that is configured as a wireless access point using hostapd. On the Pi, I run tcpdump to capture traffic and mitmproxy to attack SSL connections. I find this setup generally more reliable then putting a wireless adapter into monitor mode and capturing traffic over the air with airodump-ng or some similar tool.
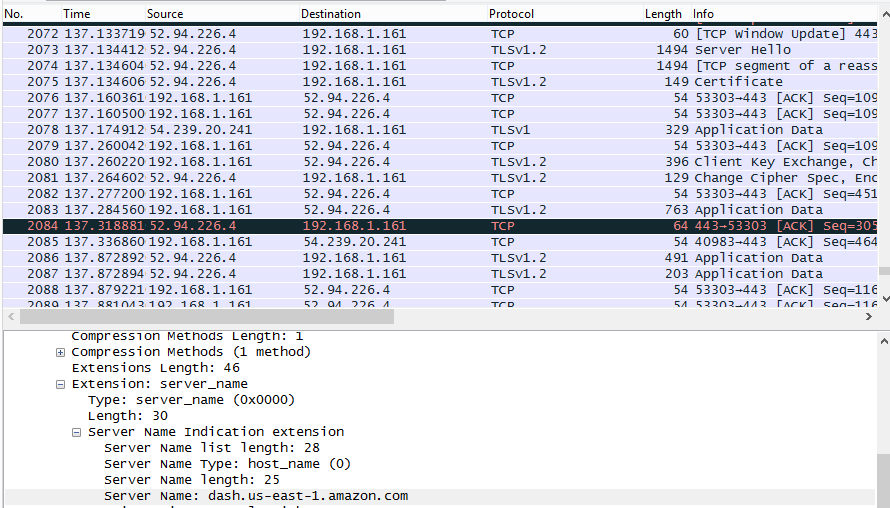
All TLS. But a DNS lookup of interest.
Unfortunately, if unsurprisingly, the traffic generated by my Dash button was all encrypted. Although some IoT devices still use unencrypted traffic to talk to their servers, I figured Amazon would do a little better than that.
Still, even TLS traffic can have some interesting tidbits inside it. For example, I learned that the dash button communicates during setup with a server at “dash.us-east-1.amazon.com”
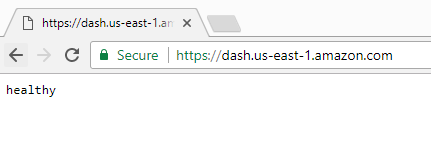
Not much. But not a 404!
A simple GET request to that site (over https) gives me the message “healthy.” This tells me that the site is willing to negotiate a connection with any client SSL certificate. That’s not always the case with IoT devices as some require clients to have certificates signed by the manufacturer.
Step 3: What to do about TLS? (aka. Dead End 1)
It would be very nice to figure out what the client is sending to this server. That information might allow us to, for example, download firmware files for the device or see what kind of information the device is sending about us to Amazon.
One trick that often works on IoT devices is a simple SSL Man-in-the-Middle attack where you present self signed certificates to the target device. In the name of efficiency (or laziness), many IoT devices do not verify certificates against a root CA and will trust any valid looking certificate they receive. The mitmproxy tool is a great way to execute these attacks and a transparent mitmproxy will often trick your run-of-the-mill IOT products.

Wand's not buying it.
Unfortunately, once again, Amazon proved a cut above the IOT norm. The device was unwilling to trust any self-signed certificates sent its way.
This meant that a MITM attack against the SSL connection was very unlikely to work. I’d have to figure out another way to snag the device’s communications.
Step 4: Network information recap
Despite not immediately compromising the devices’ secure communication channel, this first phase of testing did reveal some useful information.
First, I learned how my device identified itself on the network with the help of the arp command:
$ sudo arp
Address                  HWtype  HWaddress           Flags Mask            Iface
[other devices]
WINC-00-00               ether   50:f5:da:69:5d:2a   C                     wlan0
I also learned which API server my Dash talks to by looking at DNS records. Due to the way internet works, you can almost always find out information from even SSL encoded traffic by taking a look at DNS packets and the transferred SSL certificates themselves (which report their hostnames). The only exception being if the vendor hardcodes IP addresses into their devices or uses encrypted DNS handoffs (very rare).
In the next post in this series I’ll step away from the internet communications side and look a little closer at the device itself.